Tutorial: Integrating OmniAuth with Sinatra Application
As part of my GSoC project, my first task includes that user could login into their account on debci using their Debian Salsa account (collaborative development server for Debian based on the GitLab software).
The task is officially completed using OmniAuth library and while implementing it, I found that the documentation of OmniAuth is quite a mix-match and more focused on using it with Rails app and this gives me a idea to write a tutorial for people looking to integrate OmniAuth with Sinatra application. So here it is.
Now, depending on the provider, Omniauth requires specific strategy which are generally released individually as RubyGems. For this tutorial, I would be using omniauth-gitlab which I used for Debian Salsa in my project, omniauth-twitter and a developer strategy which could be used for project in development mode and comes with omniauth gem itself.
For simplicity purposes, I have included all routes and OmniAuth configurations in a single file app.rb.
Let’s start.
Register your application
This can be easily done – just head over to provider (Twitter, Salsa) website and find the option to create a new application and fill in the form. In the callback URL field, you need to append /auth/:provider/callback to whichever URL you used in the website field.
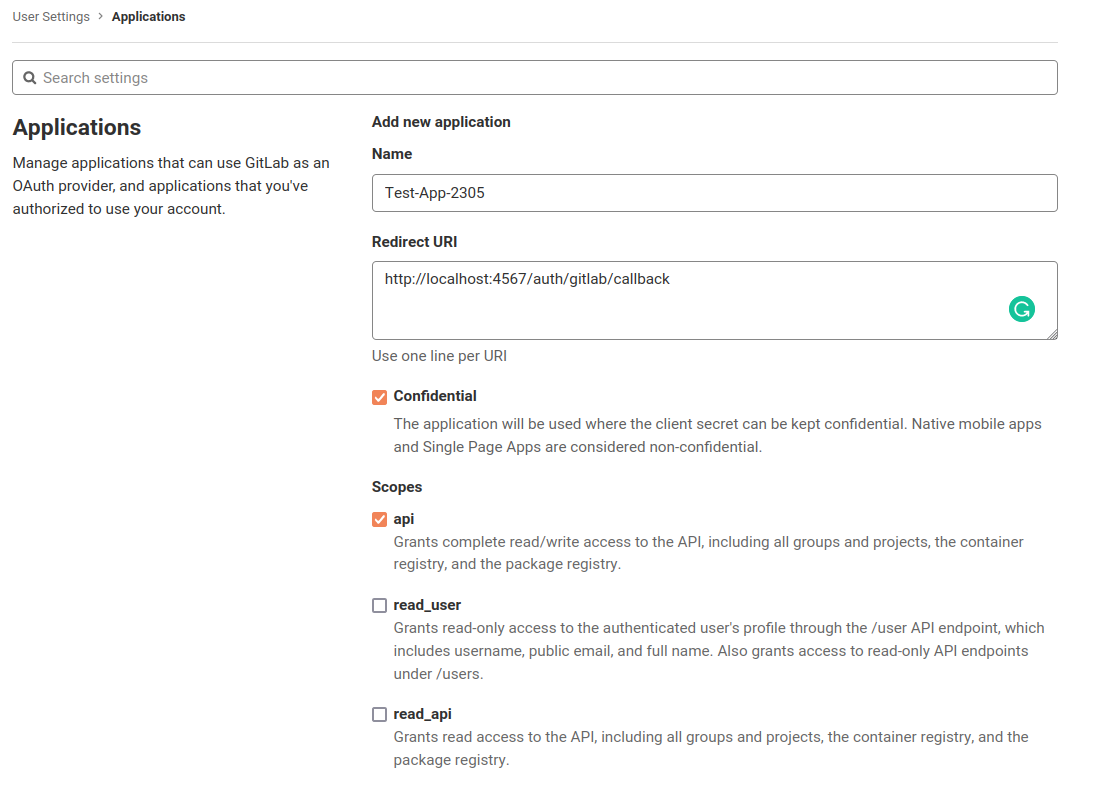
The client-id and client-secret is obtained from the console which is used in further step to set up OmniAuth.
Gems
At the top of the file, we require the necessary gems of for our project
require 'sinatra'
require 'omniauth'
require 'omniauth-gitlab'
require 'omniauth-twitter'
Enable sessions
In order for OmniAuth to work and to store the logged in user across requests, sessions need to be activated and if activated, you have one session hash per user session.
configure do
    set :sessions, true
end
Set up OmniAuth configurations
OmniAuth::Builder Rack middleware build up your list of OmniAuth strategies for use in your application:
use OmniAuth::Builder do
    if development?
      provider :developer,
               fields: [:name],
               uid_field: :name
    end
    provider :gitlab, #client-id , #client-secret,
             scope: "read_user",
             client_options: {
               site: 'https://salsa.debian.org/api/v4/'
             }
    provider :twitter, #client-id , #client-secret,
end
Here, few things to note could be the extra options used with providers, as
In developer:
fields : to specify the form fields for login in developer mode and by default it has name and email.
uid_field: to specify that which field’s value could be obtained as uid and by default it is email.
In gitlab:
scope: to limit the scope of application, by default, the api scope is requested and must be allowed in GitLab’s application configuration.
client_options: to specify the server being used as client based on Gitlab software.
Note: In case you want to have a different callback url other than the default /auth/:provider/callback, it can be specified using redirect_url option in case of gitlab provider and accordingly update it in your Application Configuration at provider’s console.
Extra configurations
To redirect to auth/failure route in case of failure even in developer mode, following could be added:
OmniAuth.config.on_failure = proc do |env|
    OmniAuth::FailureEndpoint.new(env).redirect_to_failure
end
By default, OmniAuth will log to STDOUT but you can configure this. If you don’t want OmniAuth to log to STDOUT, following could be used:
OmniAuth.config.logger.level = Logger::UNKNOWN
Setting up routes
Login route
Starting with GET /login route, where you can specify the options available to login:
get '/login' do
    <<~HTML
    <form method='post' action='/auth/gitlab'>
    <input type="hidden" name="authenticity_token" value='#{request.env["rack.session"]["csrf"]}'>
    <button type='submit'>Login with Salsa</button>
    </form>
    <form method='post' action='/auth/twitter'>
    <input type="hidden" name="authenticity_token" value='#{request.env["rack.session"]["csrf"]}'>
    <button type='submit'>Login with Twitter</button>
    </form>
    <form method='post' action='/auth/developer'>
    <input type="hidden" name="authenticity_token" value='#{request.env["rack.session"]["csrf"]}'>
    <button type='submit'>Login with Developer</button>
    </form>
  HTML
end
The auth/:provider path is created and configured automatically by OmniAuth, so you just need to send the request to that paths and auth process will start.
As per the OmniAuth version 2.0, OmniAuth now defaults to only POST as allowed request_phase methods and authenticity_token is required to validate your requests so make sure to take care of this.
Callback routes:
On success from authentication, Omniauth will return the hash of information to the auth/:provider/callback in the Rack environment under the key omniauth.auth so this is what you can use in your desired way like creating a entry to your database and storing the current user in session params.
get '/auth/:provider/callback' do
    erb "
    <h1>Hello #{request.env['omniauth.auth']['info']['name']}</h1>"
end

post '/auth/developer/callback' do
    erb "
    <h1>Hello #{request.env['omniauth.auth']['info']['name']}</h1>"
end
Here, POST request method is used for developer strategy and GET request method for twitter and gitlab as that is how their working is defined in their respective strategies.
Failure route:
If user authentication fails on the provider side, OmniAuth will catch the response and then redirect the request to the path /auth/failure, passing a corresponding error message in a parameter named message.
get '/auth/failure' do
    halt(403, erb("<h2>Authentication Failed</h2><h4>Reason: </h4><pre>#{params[:message]}</pre>"))
end
Final result
That’s it, our application is all set to be tested. And this is how it will be working.
Here, I have already logged into my respective accounts so page for entring credentials does not show up but if the user has not logged into his account, he would be first asked to log in.
For complete code, you can check out: OmniAuth with Sinatra Tutorial
So this completes the tutorial. I hope it helps others who are looking to integrate their Ruby Applications with OmniAuth. If you have any feedback, feel free to let me know.
See you next time!